
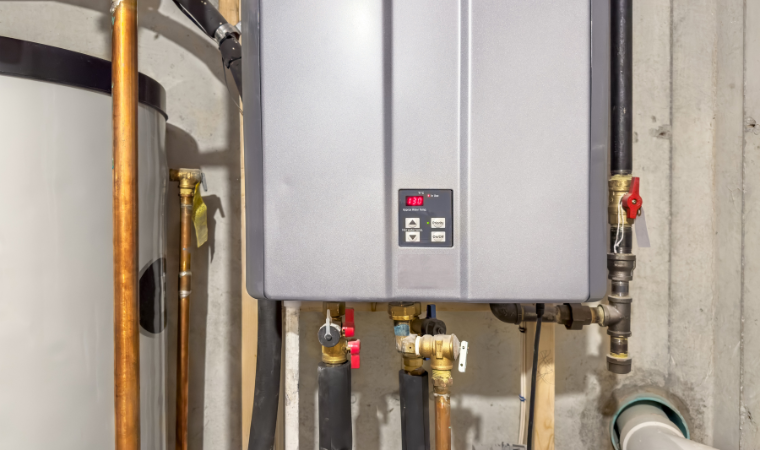
A water heater is essential in every home, ensuring comfort and supporting everyday tasks. Over time, however, certain parts inside the tank wear out and affect performance. One such part is the dip tube, a long plastic pipe that directs cold water to the bottom of the tank where it can be heated efficiently. When this component fails, your water heater won’t function properly. That’s when you may need to consider hot water heater dip tube replacement.
What Does a Dip Tube Do?
The dip tube is usually made of plastic and connects to the cold-water inlet at the top of the tank. Its purpose is simple but critical: it carries cold water down to the bottom of the tank so the heating element or burner can warm it. Without a working dip tube, cold water stays near the top, mixing with hot water and reducing overall temperature.
If your showers suddenly feel lukewarm or you run out of hot water too quickly, the dip tube could be damaged, broken, or deteriorated.
Signs That the Dip Tube Needs Attention
Here are some common symptoms that suggest the dip tube may have failed:
- Water turns cold sooner than expected during use
- Inconsistent water temperature from faucets
- Small pieces of white or gray plastic in aerators or strainers (indicating tube disintegration)
- Sediment collecting at the bottom of the tank can cause heating issues.
- A noticeable drop in water heater efficiency
These signs don’t always mean the dip tube is the problem, but they strongly suggest it.
Why Dip Tubes Fail
Most modern dip tubes are designed to last, but they can still fail over time. Factors that contribute to failure include:
- Age: Older water heaters often have tubes that weaken after years of exposure to hot water.
- Poor materials: Some tubes manufactured in the 1990s were known to disintegrate prematurely.
- High water temperature: Constantly running the heater at very high temperatures can shorten the tube’s lifespan.
- Sediment and minerals: Hard water can accelerate wear and tear.
Hot Water Heater Dip Tube Replacement Process
Replacing a dip tube is a manageable task for experienced DIYers, though many homeowners prefer to call a plumber. Here’s a breakdown of the general process:
- Turn Off Power and Water Supply
- For electric heaters, switch the circuit breaker off before starting work.
- For gas heaters, turn the control knob to the “off” position.
- Shut off the cold-water supply to the tank.
- For electric heaters, switch the circuit breaker off before starting work.
- Drain the Tank Partially
- Attach a garden hose to the drain valve at the bottom of the heater.
- Drain a few gallons of water into a bucket or outside to lower the water level.
- Attach a garden hose to the drain valve at the bottom of the heater.
- Access the Dip Tube
- Unscrew the cold-water inlet fitting at the top of the tank.
- Carefully pull out the old dip tube.
- Unscrew the cold-water inlet fitting at the top of the tank.
- Install the New Tube
- Insert the new dip tube into the opening.
- Ensure it is positioned correctly to deliver water to the bottom of the tank.
- Insert the new dip tube into the opening.
- Reconnect and Refill
- Tighten the inlet fitting.
- Turn the water supply back on and let the tank refill completely.
- Restore power or gas to the heater and test for proper function.
- Tighten the inlet fitting.
Safety Considerations
While the steps may sound straightforward, working with water heaters can be risky. Scalding water, gas leaks, and electrical hazards are all possibilities. If you are unsure about any part of the process, hiring a licensed plumber is the safest choice.
Preventing Future Problems
To extend the life of your dip tube and water heater:
- Flush the tank annually to remove sediment.
- Keep water temperature settings at 120°F to prevent overheating.
- Schedule regular inspections for older systems.
- Use a water softener if you live in an area with hard water.
When to Replace the Entire Water Heater
If your system is more than 10–12 years old and showing multiple issues beyond dip tube failure, it may be more cost-effective to replace the entire water heater instead of just one component. A plumber can help determine whether a full upgrade makes sense.